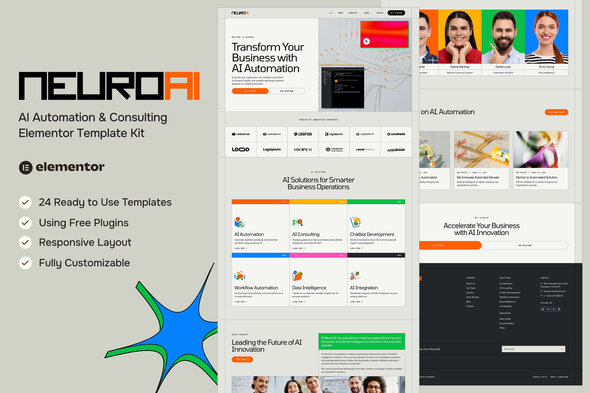
NeuroAI – AI Automation & Consulting Elementor Template Kit
NeuroAI – AI Automation & Consulting Elementor Template Kit (NOT A Wordpress Theme) is a modern, professionally designed template kit for AI automation agencies, AI consulting firms, chatbot services, and technology startups, enabling you to build a powerful online presence without writing code.
Overview and intended use
Designed to showcase AI-driven solutions, automation services, and data intelligence capabilities, NeuroAI provides a visually engaging, conversion-focused website built with Elementor. It includes 19 ready-to-use pages and 24 ready-to-use templates to accelerate development and ensure consistent branding.
Core features
- Using Free Elementor (Elementor Pro is not required)
- Unique & Clean Design
- 19 Ready to Use Pages
- 24 Ready to Use Templates
- Fully Responsive Layout
- Fully Customizable
- Cross Browser Compatibility: Chrome, Firefox, Safari, Opera
Templates included
- Global Theme Style
- Home
- About
- Services
- Service Details
- Case Studies
- Case Details
- Consultation
- FAQs
- Career
- Career Details
- Testimonials
- Contact
- Team
- Pricing
- Coming Soon
- Blog
- Single Post
- 404 Page
- Header
- Footer
- Form Consultation
- Form Newsletter
- Form Contact
Pages and templates included in the kit
- Home
- About
- Services
- Service Details
- Case Studies
- Case Details
- Consultation
- FAQs
- Career
- Career Details
- Testimonials
- Contact
- Team
- Pricing
- Coming Soon
- Blog
- Single Post
- 404 Page
- Header
- Footer
- Form Consultation
- Form Newsletter
- Form Contact
Compatibility, requirements, and plugins
- This template uses Elementor data and can be installed via the Template Kit Import Plugin for WordPress or directly through Elementor.
- Not a WordPress theme: Template kits are designed for Elementor only.
- Download your kit file from Envato or ThemeForest and DO NOT unzip it.
- If you use Safari, ensure “Open safe files after downloading” is disabled in browser preferences.
- Go to Settings > Permalinks and ensure Post Name is selected.
- Go to Appearance > Themes > Add New and ensure Hello Elementor is installed and activated. This will prompt you to install Elementor if you haven’t already.
- Go to Plugins and ensure Elementor and Template Kit Import are installed and at the latest version. If your kit requires Elementor Pro, it must be installed now and connected to your account.
- Required plugins listed in the kit: ElementsKit Lite, MetForm, Gum Elementor Addon.
Import workflow and setup
- Go to WordPress Dashboard > Tools > Template Kits and click Upload Template Kit Zip (or click your kit to view it).
- Check for the orange banner at the top and click Install Requirements to load any plugins the kit uses.
- Click import on the Global Kit Styles first. This will setup the site settings.
- Click Import on one template at a time in the order shown. These are stored in Elementor under Templates > Saved Templates and are re-used from here.
- Creating pages: Go to Pages and create a new page and click Edit with Elementor.
- Page settings: Click the gear icon at lower-left of the builder to view page settings and choose Elementor Full Width and hide page title.
- Import custom pages: Click the gray folder icon to access My Templates tab and then Import the page you’d like to customize.
- Front page: The home page is set under Settings > Reading by selecting Static Front Page.
Metforms and form integration
- If you have Elementor Pro, skip install of Metform and form blocks.
- Import the Metform block templates.
- Import the page template where the form appears and right-click to enable the Navigator.
- Locate and select the Metform widget and click Edit Form. Choose New, then Edit Form. The builder will appear.
- Click “Add Template” (grey folder icon).
- Click “My Templates” tab.
- Choose your imported Metform template, then click “Insert” (click No for page settings).
- Once the template is loaded, make any desired customizations and click “Update & Close.” The form will appear in the template.
- Click Update to save changes.
Global header and footer setup
- Import the header and footer template.
- Go to ElementsKit > Header Footer, select Header and click Add New.
- Give it a title, leave Entire Site selected and toggle Activation to On.
- Click the template title and Edit Content.
- Click the gray folder icon and select the header template to import and Update.
- Repeat for Footer.
- If you have Elementor Pro, headers and footers are customized under Templates > Theme Builder.
Flexbox container and related settings
- Make Sure You Have Enabled ‘Flexbox Container’
- In the Dashboard go to Elementor > Settings > Features
- Go to ElementsKit > Header Footer select Header and click Add New
- Scroll down until you find ‘Flexbox Container’ > Active
Detailed guides and support
Notes and licensing
This Template Kit uses demo images from Envato Elements. You will need to license these images from Envato Elements to use them on your website, or you can substitute them with your own.
Workspace reference: Envato Workspace
The information on this website is sourced from the
ThemeForest product page.